Working with tags and statuses
Tags and statuses allow you to flexibly organize and filter your sessions on your desktop. With their help, you can quickly find the sessions you need, group them by meaning, and track your progress.
Creating tags
A tag is a colored label with a name that you can assign to sessions for grouping and navigation.
Method 1. When creating a new session
Start creating a new session.
Go to the "General" tab.
Find the "Add tags" item.

Enter the tag name.
Select a color from the options.
Click "Save."
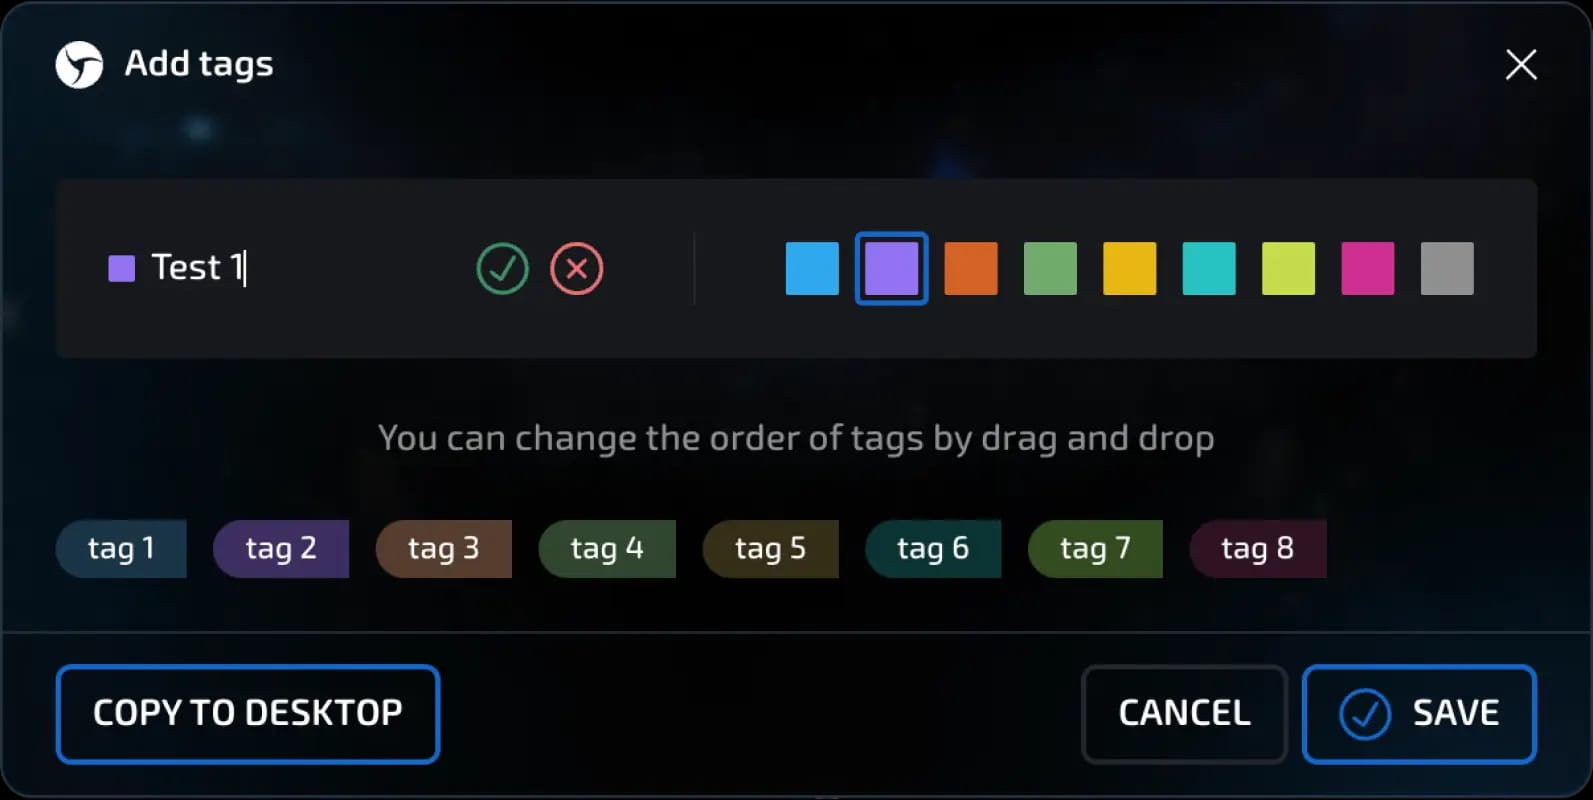
When you click the Copy to desktop button, you will be prompted to select the target desktop. Then, after confirming with the Copy button, all tags from the current desktop will be copied to the selected one.
Method 2. On an existing session
There are two ways to assign/change tags on an existing session: 1. Through the quick tag change menu (as described below) 2. Through the session settings
Open your desktop with existing sessions
Find the session to which you want to add a tag.
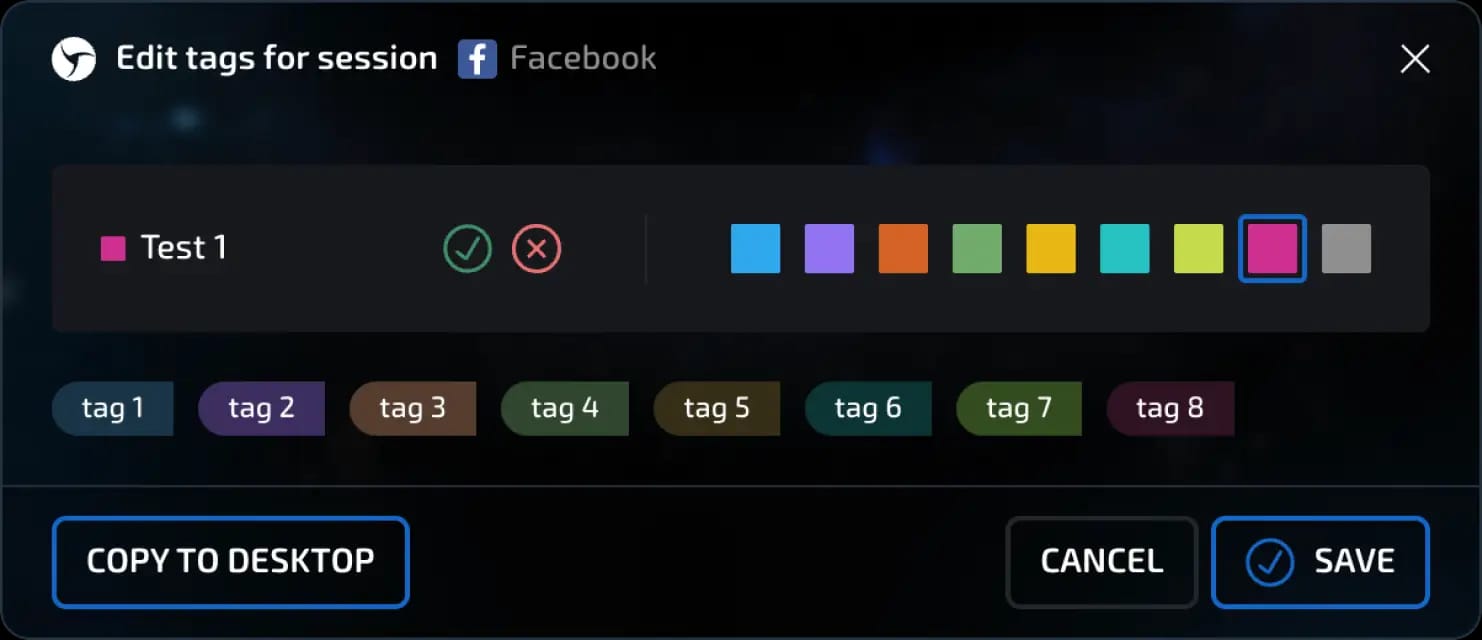
Click on the "Add tag" button. The quick tag change menu will open. The column will be available if its display is enabled in the settings (three horizontal stripes in the upper right corner).
Enter the tag name.
Select a color.
Click "Save."
How to copy tags to another desktop
Open the tag control panel by clicking on the "Tags" button in the upper right corner.

Click "Add tags"

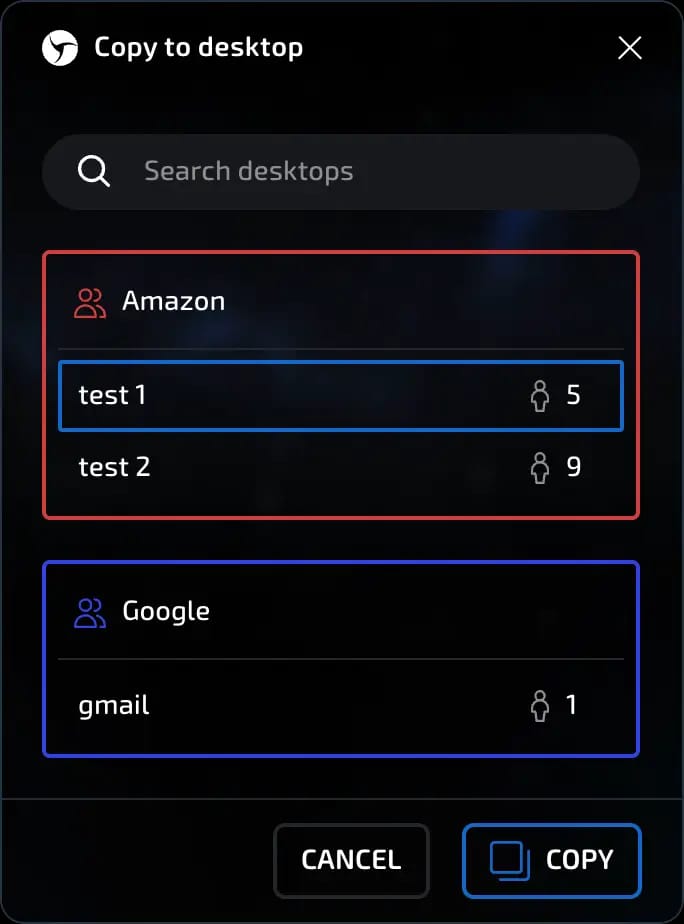
Click the "Copy to desktop" button.
In the window that opens, select the desired desktop.
For convenience, you can use the search bar - enter the name of the desktop.
Click "Copy." The selected tags will be transferred to the specified desktop.
invisible text for space
Please note: copying does not delete tags from the current desktop - they are simply duplicated on another one.
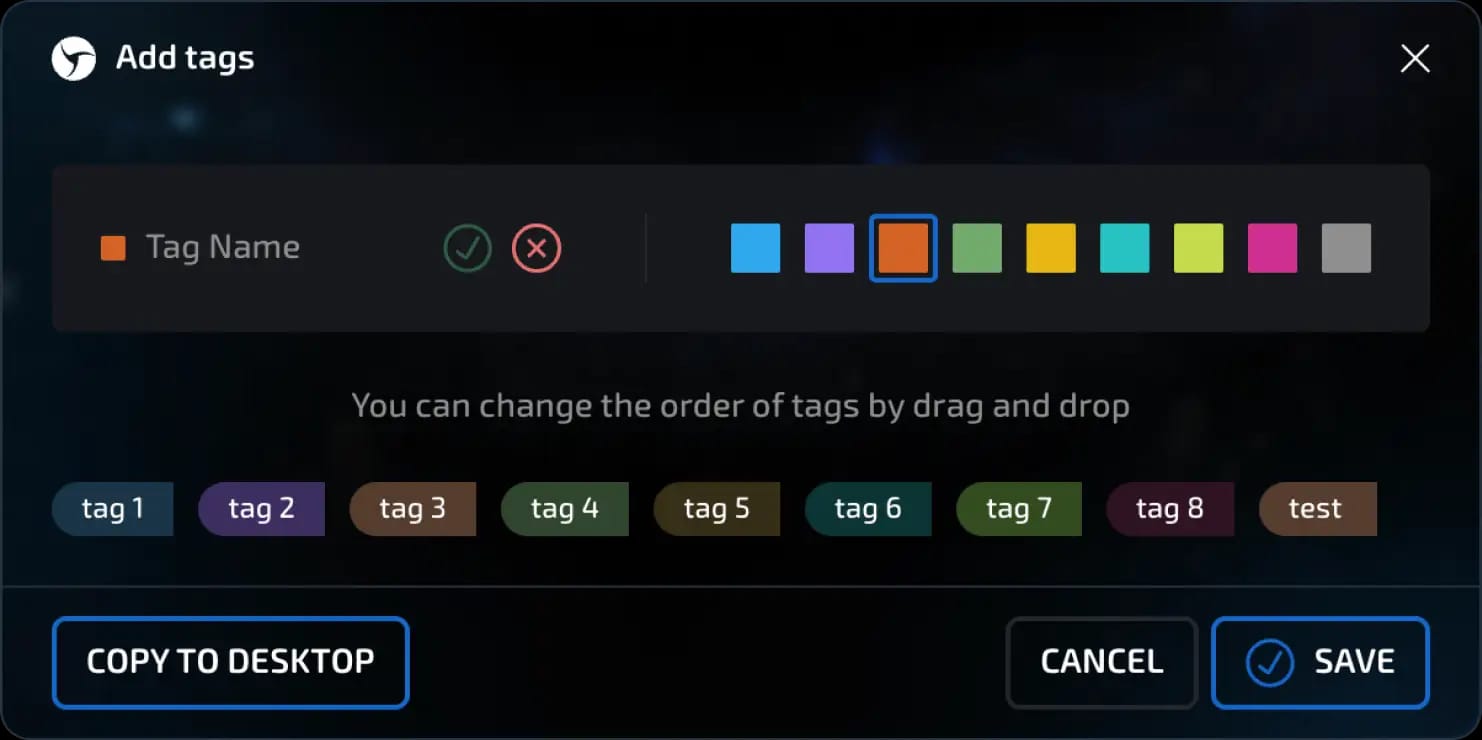
How to change the order of tags
You can customize the order in which tags are displayed on the desktop:
Open the tag control panel by clicking the "Tags" button at the top right. - Click "Add tags."
Hover your cursor over the tag you want to move.
Hold down the left mouse button and drag the tag to the desired position.
Once you have finished arranging the tags, click the "Save" button to apply the changes.
IMPORTANT!!! The changed order of tags will only be saved after you click the "Save" button.

Working with statuses
A status is a separate color label that can be used to filter sessions and indicate their completion stages (for example: "In progress," "Done," "Test," etc.).
How to create and assign a status
Go to the desktop.
Find the session you want.
Click on the "Status" field.
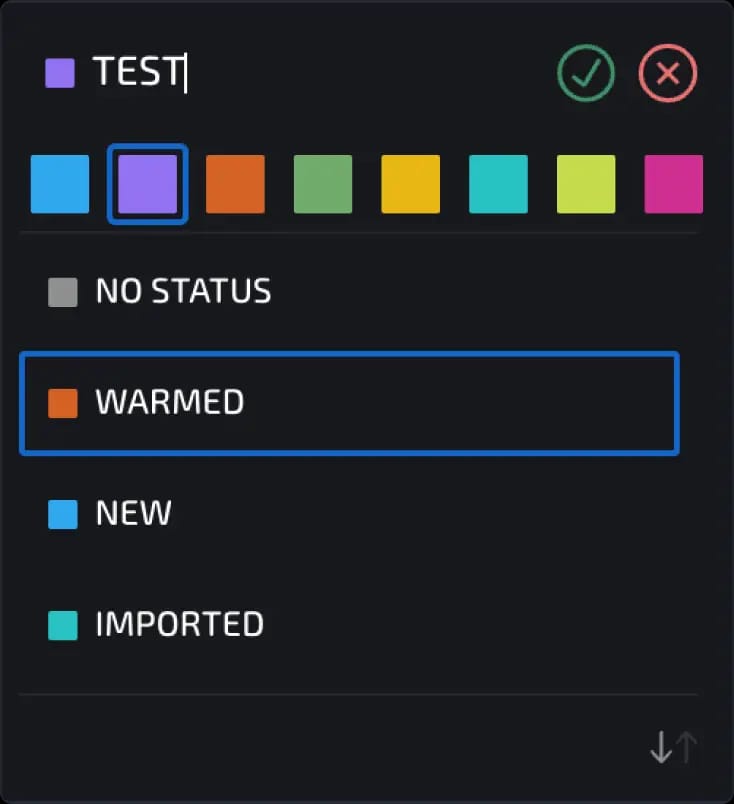
Enter the name of the new status (for example, "Test").
Select the status color.
Click on the green check mark to save.
Now the selected session will display this status.
You can also assign statuses using bulk actions on sessions.
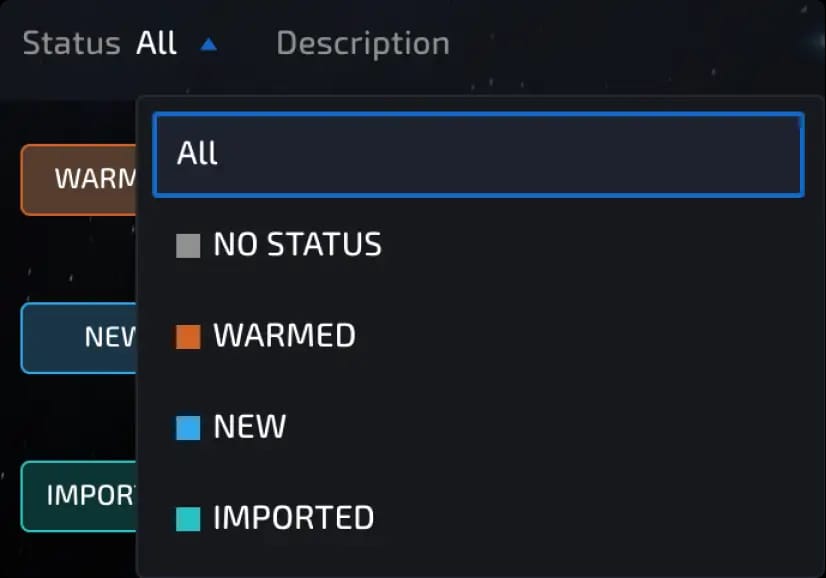
Filtering by statuses
Go to the desktop.
At the top of the interface, find the Status column. Click on All to open a drop-down list of available statuses.
Select the desired status - only the appropriate sessions will remain on the desktop.
Previous page
Next page